We offer many different mounting brackets and accessories for mounting a power supply to your pedalboard. Because procedure differs from frame to frame, we have compiled a number of charts, showing you how to install the different models of power supplies.
Voodoo Lab power supplies
OPEN THE CHART FOR VOODOO LAB INSTALLATIONS
Only pedalboard/power supply combination that does not need any additional parts or drilling is Voodoo Lab Dingbat pedalboard used with Voodoo Lab power supplies. Necessary screws are provided with the pedalboard.

– For attaching Voodoo Lab power supplies with other pedalboards you use either Pedaltrain’s Voodoo Lab brackets, or black 3M Dual Lock SJ3551 tape.
– Pedaltrain BRKT-2 brackets are attached to Voodoo Lab power supplies with the power supply’s own screws. The brackets come with the correct screws for mounting them on the pedalboard.


Cioks power supplies
OPEN THE CHART FOR CIOKS POWER SUPPLY INSTALLATIONS
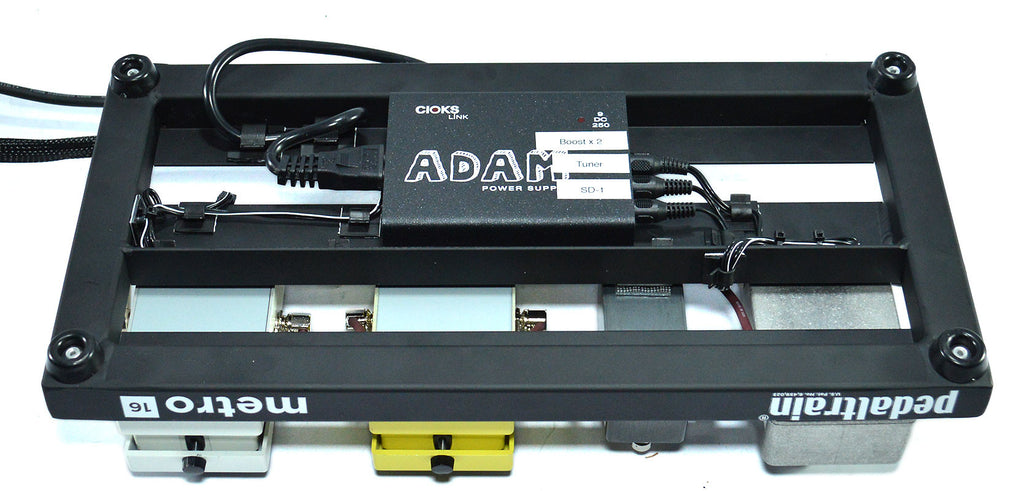
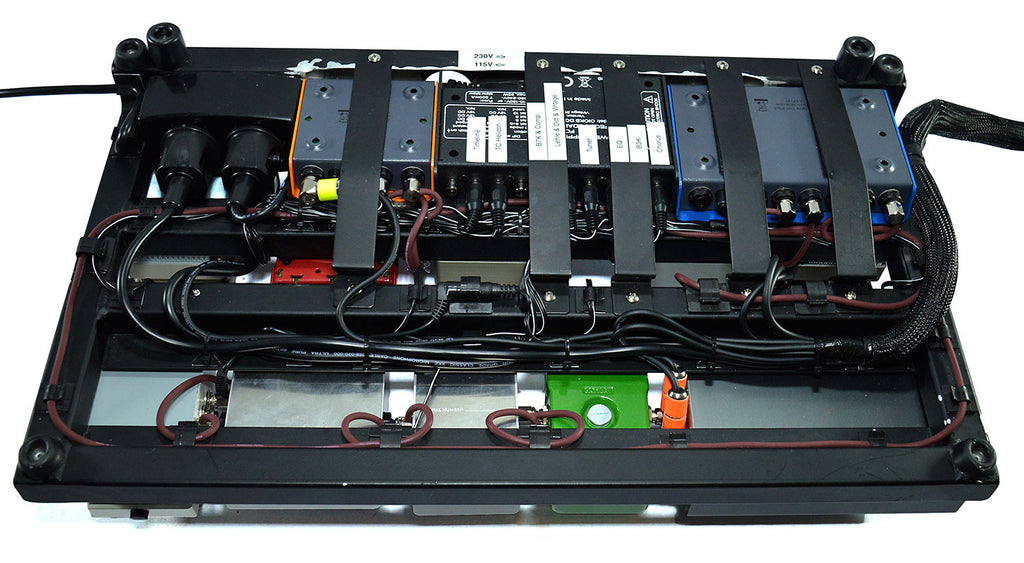
For Cioks power supplies you use either Pedaltrain’s Universal Mounting Kit brackets, Cioks’ own screws (that come with the PSU), or black 3M Dual Lock SJ3551 tape. In the picture, power supplies are mounted beneath the T-Rex frame with SJ3551 Dual Lock.

– Smaller Cioks power supplies come with a cardboard template showing you where to drill the mounting holes.

– Here you can see picture of Cioks power supply mounted underneath Pedaltrain with Cioks' own screws.

Some notes:
– The installations in all charts are from underneath the frames. You can, of course, also mount any power supply on top of your board using clear 3M Dual Lock SJ-3560 tape. Cioks units have a coarse finish, which means you should use the black 3M Dual Lock SJ3551 tape meant for rough surfaces.
– You should pad out the space between Pedaltrain’s Universal Mounting Kit brackets and the power supply chassis with two pieces of 3M Dual Lock (any type will do). This will make for a tighter, snugger fit, and fill the empty gaps.
You can use these brackets to install anything beneath the board, as long as the equipment’s height fits. It is easy to bend brackets by hand according which decives you have mounted underneath the board.

– Cioks offers additional Mounting Kit for Pedaltrain frames, which will raise the frame to fit a number of different power supplies. Our charts show only installations without these risers.

Once you’ve chosen the right power supply for your frame, and once you’ve added the mounting brackets, you can start installing the power supply on your pedalboard. In this tutorial, we will attach Voodoo Lab power supply underneath Pedaltrain frame using BRKT-2 brackets.
- Clean your pedalboard frame thoroughly with blue PRF 6-68 spray and a clean rag. The surface must be free from grease and dust. Be even more thorough if you’ve already gigged your board. If there’s lots of residue from old adhesives, we’d recommend PRF’s Label Off.
- Place the frame face down on your table.
- Try to place your power supply in such a way that it’s as far away as possible from any pedal susceptible to induced hum. Use your notes from the pedal testing at the beginning.
- Place the power supply in its brackets inside the frame. If you’re using a Voodoo Lab or T-Rex model, you should plug in the IEC-connector to make sure it fits “inside” the frame.

- Mark the required holes with a felt pen or a sharp tool.

- We’d recommend making small dimples in the centre of each mark, which will keep your drilling bit from sliding across the frame’s surface.

- Remove the power supply assembly from the frame and place it aside.
- Drill 3 mm holes into the Pedaltrain frame. Cioks’ Adam and DC5 models require 4.5 mm diameter holes. Pedalboard frames are made from aluminium, making it easy to drill holes, even with a relatively weak cordless hand drill.

- Put the power supply assembly back in place above the holes.
- Use the screws supplied with the brackets to install the assembly with a screwdriver or a cordless drill.

- Mark out the power supply outputs on a long strip of masking tape, according to the plan you’ve made in the beginning. Use the model names of the effects, and also note where you’ll be using a splitter cable. These aren’t the final markings, but they’re good enough to keep you in the picture.

-
Plug in all the power supply cables that you're going to need with your pedals.
If a pedal isn’t equipped with a standard power connector, you can use the Battery snap Cable to connect the power supply. Depending on the pedal’s collectability and the type of housing, you could use a small file to make a small channel in the casing to prevent the power cable from being pinched between the casing and the base plate.

If needed, mark the power supply cables with bits of masking tape, too. This will make connecting the right plug to the right effect even easier.
POWER SUPPLY CABLE will be left dangling loose beneath the frame for the time being, so finding the right output is quite easy. Should you have any doubts about a cable, simply double-check.

For pedals with exotic power requirements and/or non-standard connectors, you can also install a power strip of two or three Schuko-outlets to the underside of your pedalboard. This will make it possible to use the original power supplies for these effects.

The Schuko-sockets will power the pedalboard’s PSU as well, and they will be fed by the AC-power cable in your cable loom, without the need for additional cables.
*****
If you have purchased all the parts and components but get a feeling that you might not be up to the task after all, we can make your pedalboard for you, using the components you have bought from us. Don’t worry, we won’t let anything go to waste.
START BUILDING YOUR PEDALBOARD TODAY.
Fill in our planning form


